


Pink and blue and purple faux fur ... ... My life is complete.
It's so awesome my head is exploding right now.

The best part is this is pretty easy- and takes about 45 min cut to finish.
Let's do it.
What you need:
1. Faux Fur I got mine at Joann Fabrics but Fabric.com has an awesome selection as well. Buy a half yard to play with. You might give yours an unintentional trim like I did the first time-and that will piss you off. So buy extra.
2. 11 to 12" zipper (or longer)-- you can trim to size / no prob.
3. SF101 interfacing is OPTIONAL for the lining. I like to use it for extra body, but it's not super necessary as the fur gives it a good feel by itself. In this tutorial, I omitted it.
4. Sharp scissors , a good light, a zipper foot is SUPER helpful but don't freak if you don't have one.
Throughout I use about a half inch seam. I also added a D ring but left that out so this is fast and easy.

1. Cut the pieces: (2) of exterior Fur @ 8.5" x 11.5"
(2) lining pieces / same measurement
(2) zipper tabs @ 2" x 2"


Cut the faux fur pieces so the nap is going downwards-- so if you "pet it" it would be like a cat or something. Measurements again are 8.5" tall and 11.5" wide.

2. Make the zipper tabs and place them on the ends of the zipper. Total zipper length should measure 11" when complete.
Zipper tabs are like bias tape. Fold each raw edge in to meet and the middle and press, then fold again on itself and slide zipper end in. Pin in place and sew along this edge.
Trim to width of zipper when finished with both sides.
Pop on zipper foot if you have one.
3. Place zipper right side facing down onto one fur exterior piece. Zipper pull is facing down on the left side. Baste in place.
(Basting is a long stitch length- for my machine it's #5. Just in case you were thinking turkeys.)

4. Once it is basted in place, take one lining piece and place it on top, right sides together with the fur. Pin in place and once secure, flip the whole thing over so you are looking at your basted stitches from previous step. Now sew with a normal stitch length exactly on top of those basted stitches. This will attach the lining and exterior on one side of the zipper.


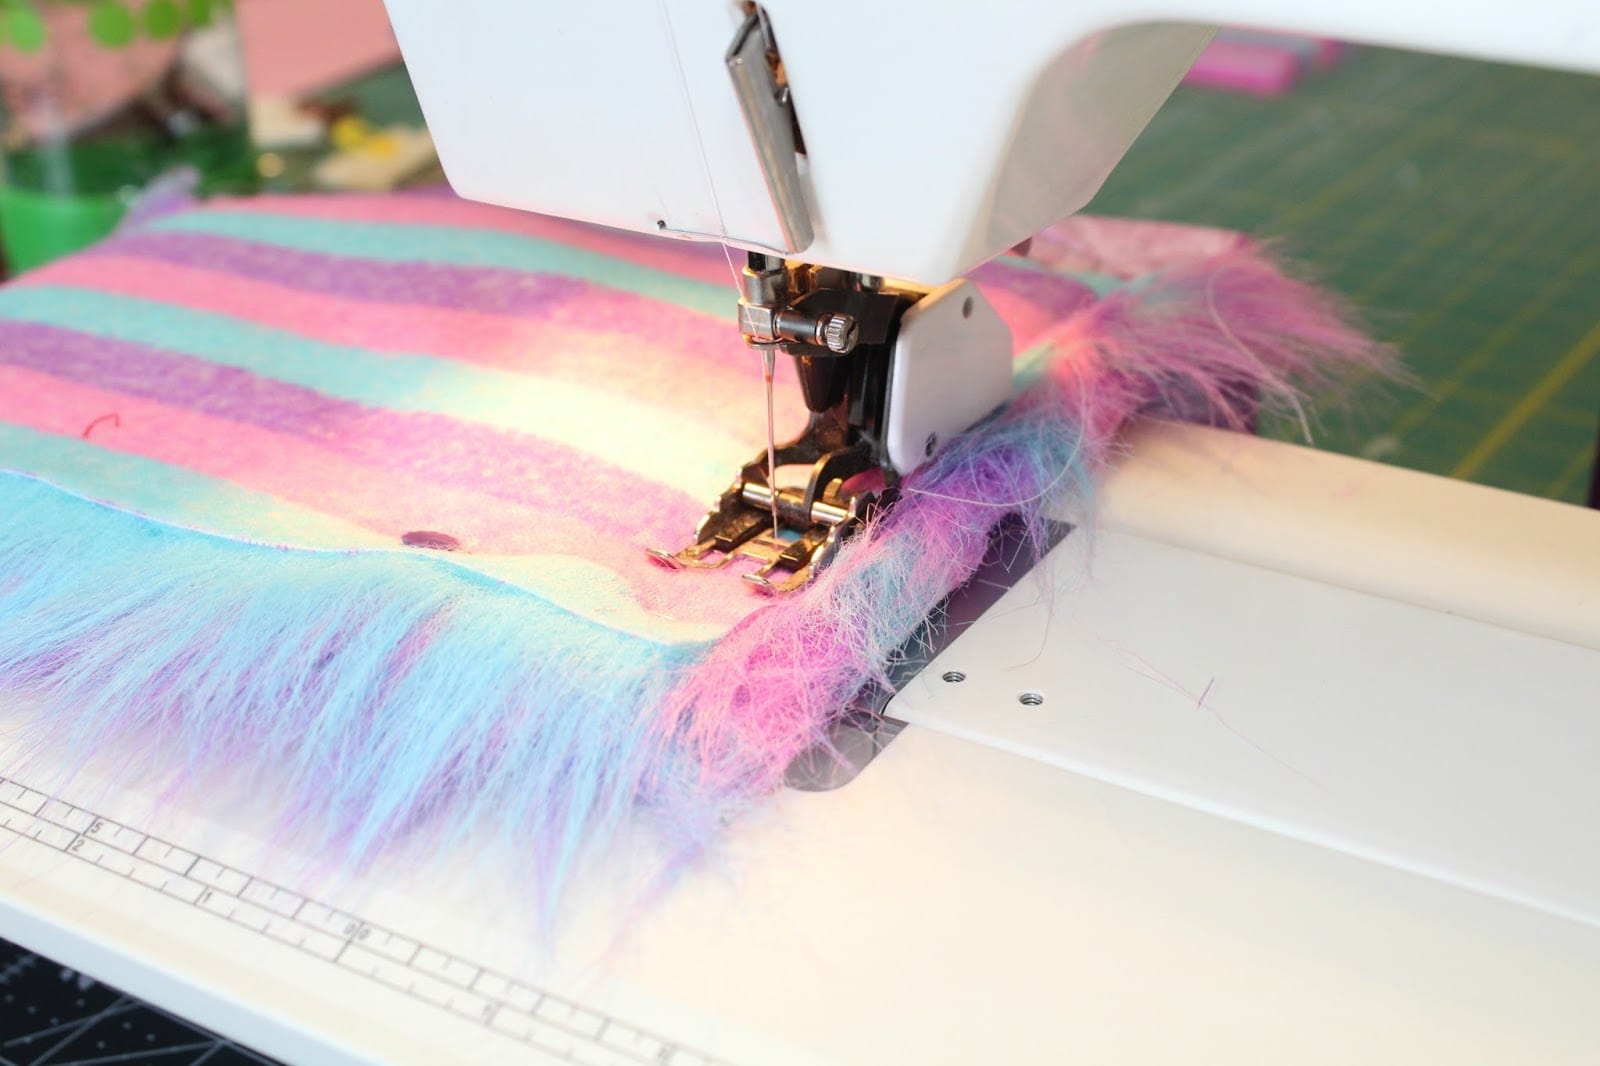
5. Press fabrics wrong sides together away from the zipper. Carefully top stitch this while keeping fur out of the way and the lining in place underneath.

Now we add the other side in the same way.
6. Place remaining fur piece right sides together with constructed pouch piece, lining up the sides and pinning to the open side of the zipper tape. Baste in place again so things don't shift.

7. Place remaining lining piece right sides together with lining constructed portion, aligning top and side edges. Sew to attach as we did before, and then press away from zipper and top stitch this side as well.

Pop on normal sewing foot.
8. Open Zipper. Don't forget or it will make you cuss.
9. Place both furry sides together and align/ pin in place. Same with lining pieces. Mark a gap at the bottom of lining pieces for turning right sides out later.

10. Sew around the entire bag, starting at one side of the open gap and ending at the opposite side of this gap. I like to baste stitch the gap part,then rip the stitches out afterwards as then it's easier to press and fold in, giving a neater finish.
11. Turn right sides out.
Tuck lining back inside and check fit. If good to go,sew opening in lining closed either by hand or machine stitch.

12. Unpick the hairs in the seam. They come right out quite easily, I didn't use any tools at all. I've heard of people using a tooth pick or needle if you need some help.

Admire your fancy furry clutch. SO awesome.
How can you deal?
By wearing glitter pants, that's how.
And smiling really bigly...
(Dig /jab...sorry, had to...it's a crazy world, I have to poke fun where I can to survive.)


I want to see your furry clutches! Tag me on IG @sewhungryhippie or comment here if you post elsewhere.
YAY have some fun rockin' these lil" furry wonders!


Here is a PDF of this tutorial.


